Thursday, October 13, 2011

Victorian Splendor - Part 2

Let me begin by saying, it's a miracle that I am still even working on this project!  My mind didnt' really have time to rest to really think this thing through before I was "thrown in the fire" so to speak, my "adopted daughter" is due to give birth at any moment, and I've taken on the Grandparent role for her other 2 children since her Mom doesn't live here and well, my thyroid meds are off again and I'm just tired.  Add to those things I seem to be at that menopausal witch time of my life and all things added together are not a great beginning to my 2nd only gingerbread house.  LOL  I'm trying to go with the flow though.  All those years of praying for patience with my youngest son have suddenly come in handy.  LOL

So, we've had a couple close calls on Vanessa giving birth so I've neglected to get started on anything that might take time, because I don't like leaving a huge mess in the kitchen.....it's the OCD.....so anyway....I decided, given that I had 2 vacation days left at work I needed to use before next month anyway, and the fact that I've been on edge, maybe it was wise to go ahead and take those 2 days.....so here I am.  This week, I found the gingerbread pieces that I made last Sunday, apparently didn't bake long enough and they were being very pliable and bending....so Tuesday evening was spent re-baking all the pieces.  Last night was spent getting together a pattern for the dog house, the teeter totter ( these will be out in the "yard") and fence pieces and last but not least, re-sizing the round room pattern.  Today I got up early and started rolling out more gingerbread dough......now at this point, I have rolled out 2 rooms from Sunday, of which the 2nd completely flattened out and didn't make it.  So, I started early this morning, 7:30am....thinking I'd get a early start so maybe I could actually take a break and read this afternoon.  I love to read.  Anyway....let's just say.....I almost threw EVERYTHING in the trash and sent out a email that said, I'M DONE!!! NO MORE......oh wait I did send that particular note out to my friend Rich, the designer.....yeah, I wasn't in a good place this morning......I sent that note to him after round room #7 crashed and ended up a pile of dough on the bottom of my oven......I can't even begin to explain how that happened....but it did!  So after sending the email.....that was short and sweet, it literally said I'M DONE!, LOL, I sat down and contemplated giving up.......my mother always would tell my sibling and myself, you have 5 minutes to cry, but then get over it.  I didn't cry, I was too mad.......but I gave myself 5 minutes and re-thought the whole round room process and then it occurred to me I was going about it all wrong!

I had been trying to bake the round room on a can to get that curved effect.......but what occurred to me as I sat there ticked off is that, when the piece is coming out of the oven, it's still very pliable.....what if I baked it flat and while it was still warm, draped it over the can as it cooled to get the rounded effect?????  So, I got back up and started rolling out more dough.......guess what, it worked!  WOOOOO HOOOOO!!!!  Now, it did have some, what I refer to as "stress fractures", but the fact that I plan on treating that wall with a stone look anyway, I felt it was okay.  Here are the finished pictures:

So once that was done and the fence pieces, the teeter totter and dog house pieces were done, I cleaned up the mess.....and then made royal icing, as I'm going to need it to "glue" my house together and I'll also be using it to decorate with.  I went ahead and colored some of it brown, since that wall is going to have
"brown stone" on it anyway.  I thought if I painted the wall it would help re-enforce the piece and make it stronger.  When royal icing is dry it's very hard, so I am hoping my theory works......at this point, all I can do is wait and see.  Here is a couple pictures of the piece now "painted".

That's it for now......I'm feeling better than I was at 10:30 this morning.  I no longer have the urge to dump everything in the trash and forget this even happened.  LOL  I have decided I am crazy for attempting this.....I have no formal culinary training, just a passion of all things baked and decorated......I'm hoping that passion is strong enough to get me through the next 20 days without killing a certain designer I know. LOL

Until next time....the saga continues..........

Sunday, October 9, 2011

2011 Gingerbread Project - Victorian Splendor

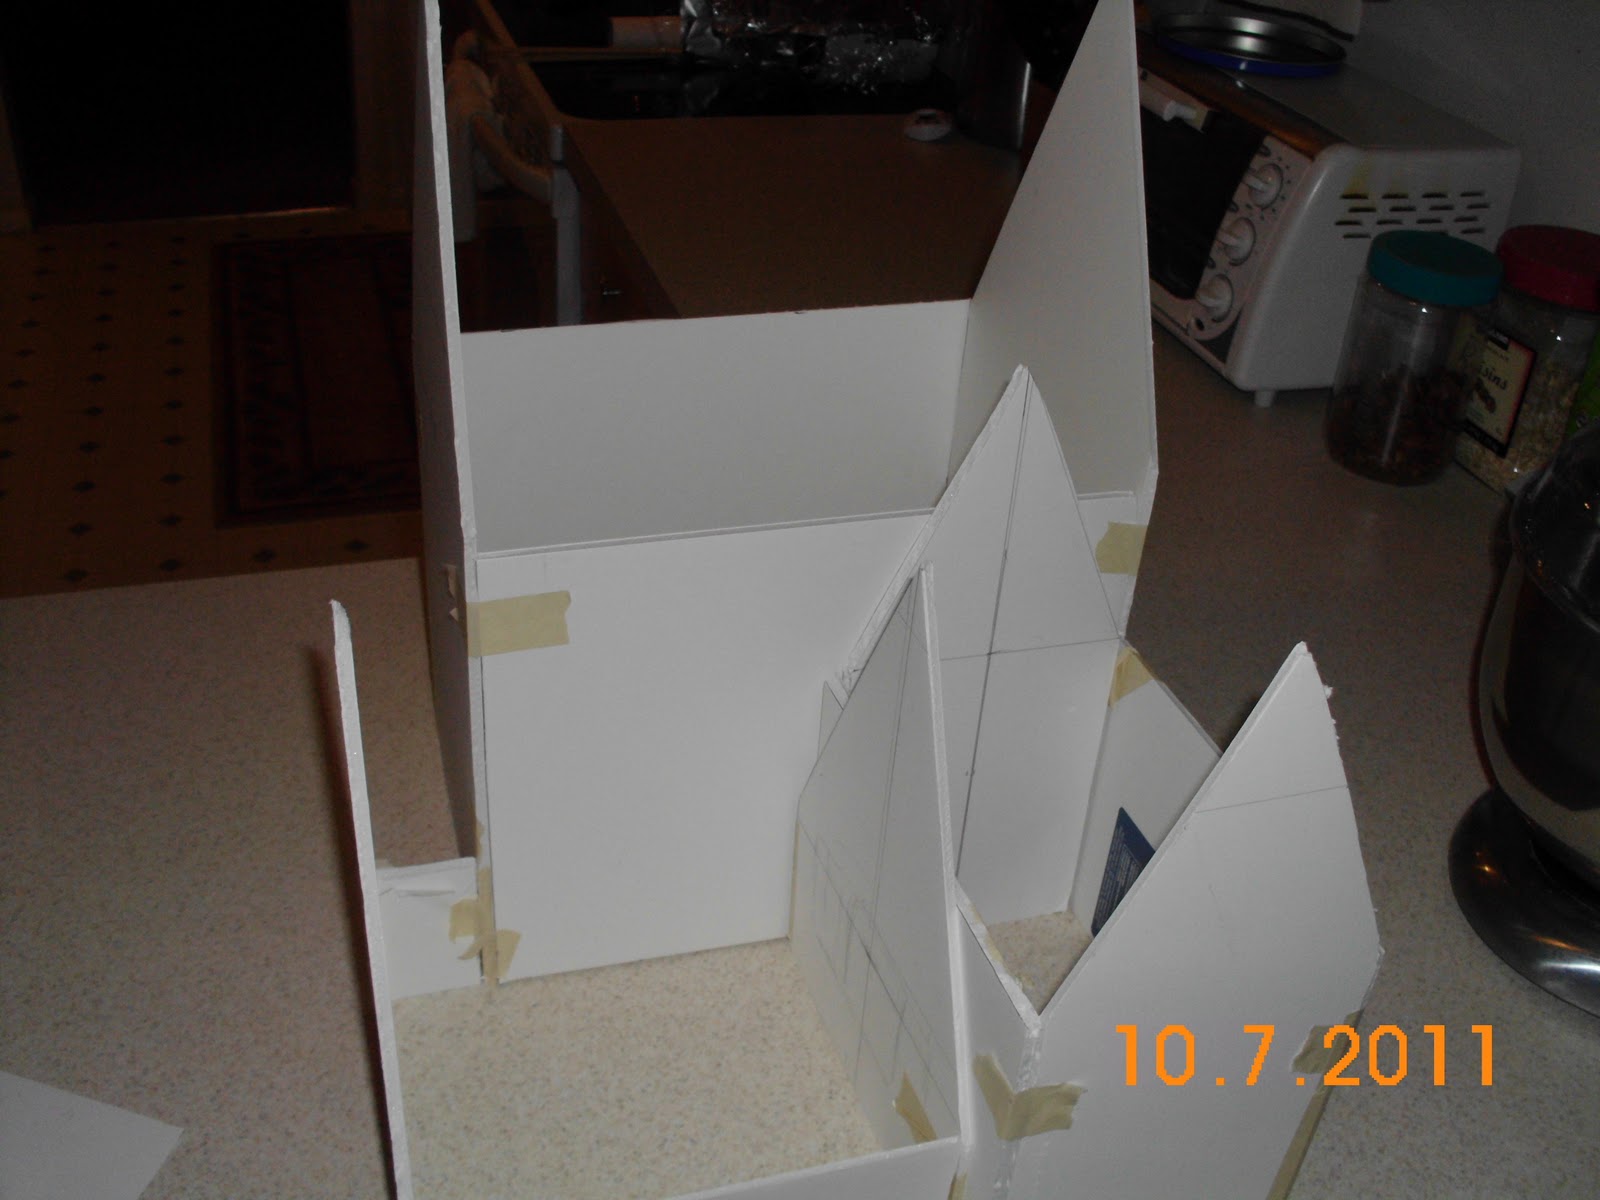
So, it's that time of year when we start thinking of the holidays.  This year the holiday baking has begun even earlier for me as I was talked into donating a Gingerbread House to the Orlando Museum for their Festival of Trees event.  The event is held each year and Gingerbread houses are donated and then bid on with the proceeds going to fund different events throughout the year.  I attended the Festival of Trees last year and thought the Gingerbread houses were great and voiced a thought out loud that I thought I could probably do that some day.....well that day is here.  I have exactly 1 month from today to finish this project so the pressure is on.  My best friend Rich Scott is a designer and he wanted us to do this project together.......now he doesn't bake or decorate so his contribution is the design of the house.  I expressed my thoughts to him and he came up with the pattern.  The process began with thoughts and drawings and then the mock up started Friday evening.....here is what we hope the framed up house will look like.


Now of course, the idea is that is will be sitting on a base and hopefully will be lighted....yeah, that's the designer's job, not mine....I bake and decorate, he's in charge of all the "technical" stuff. LOL   So, of course the next thing I'm going to need is of course, gingerbread.  I made 2 batches, thinking it would be plenty.  I can tell you now that all the pieces have been cut out, that it was JUST enough, so after cutting out all the pieces and baking them, I made another batch....just in case something breaks or something else is needed.
Here's one batch:

So I started the cutting and baking of the pieces, choosing what I felt would be the most difficult piece to make....the "round room".  The first try, I had it draped across a big can ( it actually was a metal bucket with a handle that I'd gotten with goodies some time ago) covered in foil and lined with a piece of parchment paper......it was almost ready to go in the over and it slipped off and tore.....had to start again.  The second time, I taped the parchment paper down, and tried to use silverware to keep the can from rolling.


I was pretty psyched that it went in the oven and didn't fall.  When the buzzer rang in 13 minutes I was so excited.....I pulled it out and it looked perfect.....and I was about to do a little dance, when my assistant......(the kill joy....just kidding, he did try to soften the blow)...pointed out that the back side had had a little accident.....here it is:

So, at this point, I stood there and thought, well.....huh, what to do......I decided I would think about it later.  I thought about it as I was cutting out all the other pieces....and there were a lot and they were big....you know how designers are, it has to be big and spectacular! LOL  Anyway, the thought came to me to make the room smaller by cutting off that edge with the dremmel tool.....didn't use power tool with last's years project, but this year it looks like it's going to be necessary.  The outside walls are not ALL going to be the same.  Some will have a brick look and the others a stone look.  To start the look on the brick walls, the gingerbread was scored a bit so when I "draw" the lines on it with the icing, it would be easier to line up.

After all the pieces were baked, I needed to make sure that the right piece ends up being put together in the right place so I used an edible food marker to make the back of all the pieces so hopefully it will eliminate confusion later when the house actually starts going together.

And here are all the pieces all baked and cooling and getting really hard so that they can be put together to make a beautiful Victorian Gingerbread house.


 I will make the royal icing later or tomorrow evening and the real fun will begin.  I hope you'll stay with me through this journey.  I've never made anything that would be up for "bidding" and I have to say, it's adds a huge YIKES factor to the whole project for me.  I'm excited and scared to death all at the same time.  I'm not sure if we are just really so arrogant, that we think we can pull this off, or we are just really stupid and crazy!!!  LOL  Time will tell.  I do know it will be fun and it will be edible, should someone want to eventually eat it.

So, following along with me over the next month while it all comes together.

Saturday, October 8, 2011

Baby Shower Edibles

So, all the decorations came together and presented the "look" I was going for.  I have to confess now though that, I'm kind of over lime green and caribbean blue now.......for a while anyway.  I started the treats by making the cookies several weeks ahead of time, decorated them, pout them in their individual little bags and then placed them in freezer bags and froze them.  I took them out the day before the shower and they tasted like I'd just made them.  Here are some of the photos of those:


I made cake pops in three flavors, chocolate cake, white cake and butter cake.....made them into balls and froze them until I was ready to dip them and decorate.  Now, when the time came to take them out, I guess I didn't let them get to the right temp before coating them in chocolate because they cracked, a lot!  So I let them un-thaw more, which I guess I ended up letting them get too warm, because then the were falling off the stick.  I got very frustrated and decided to put them in the fridge and try the next evening.  Thank goodness I had started a few days ahead of schedule because that evenings efforts were wasted.  The next evening the dipping and decorating went much smoother and everything worked.  After I had finished the cake pops I just stored them in the fridge until party time.  Here are some of those photos:

These are before dipping:


and after:

I also made chocolate dipped pretzel rods and also chocolate dipped marshmellows.  I have to say, the marshmellows were REALLY sweet, would have been better dipped in a milk or bittersweet chocolate, but that didn't match my color scheme. LOL  Here they are:


ANd last but not least, I made cupcakes.  I made 9 dozen cupcakes the day before the shower and while the chocolate didn't really coordinate with the whole color scheme, they are a favorite and so of course, I had to bring those along too.


I also made some chocolate dipped oreos but they melted so badly before the shower even began that they got put in an ice chest to chill and were forgotten until clean up time.  The Mom-to-be was more than thrilled to have them all to herself for a treat later.


So, all in all, lots of work, but it all turned out really well.  I was pleased with the final results.

Let me know what ya'll think!  Have a great day!

Friday, September 30, 2011

Baby Shower Continued

So Sunday, September 25, 2011 finally arrived and I was ready.  I had so much adrenalin pumping through me, I thought I was 20 again......yeah, after going non-stop for 12 hours, my body remembered, I am definitely not 20 anymore. LOL  The day was stunning, just as I order, and it didn't rain, just as I ordered, and there was a breeze, although kicking up just when I was putting the table decorations, wasn't what I had in mind and it was a bit gusty, but all in all it worked out fine. The temperature was rather warm though.....okay, it was down right hot and before the shower was over, all the goodies were melting but that didn't slow anyone down, they all said they were still wonderful. LOL   The Dessert Table was the last "project" that I worked on and the table looked just as I imagined it would.  I was very pleased with it.  Here is a photo of it.


I made the cake pops, the cupcakes, and the iced decorated cookies....there will be better photos of them later....and added gumballs, sixlets and candy sticks all in the shower color scheme......for my first big party....I think it turned out rather well.  The Mom-to be was so excited, she cried and cried....tears of joy of course.....here she is, Vanessa....


I color coordinated the tables as well and at each place setting there was a chocolate covered pretzel rod and a chocolate covered marshmallow on at stick, all color coordinated of course.....here are some of those photos...


I made the floral arrangements on each table as well as the diaper centerpieces.  The centerpieces were three cloth diapers rolled up and then tied together with a ribbon and added a flower and lolly-pop.  The parents-to-be took those home as gifts as they will be needing those for burp towels and such.  ....it's hard to see them, but here is what they looked like before I added the flowers and lolly-pop to them at the site....


The floral arrangements were mason jars wrapped with a bandanna that was in shower colors and tied with a ribbon at the top and then silk flowers were added.  Floral arranging is not my thing....my eldest daughter makes the most beautiful arrangements, but she's in Texas so, I was on my own with this. LOL  They weren't bad considering these were my very first arrangements. :-)


The plastic silver ware was wrapped up nice and neat and tie with a ribbon to just add that extra touch to the entire table decor, I found the paper place mats in coordinating colors at a local Cake Supply store.....they really have everything you could want for a party.  http://www.dandgoccasions.com/  If you're ever in Orlando and you need things to decorate with or supplies to bake stuff with.....this is the place to go!

I will go into the diaper cakes I made and better pictures of the goodies with some step by step photos another day.  In my opinion the shower was a great success.....everyone was smiling and laughing and I even played games that had the men involved.  Several of the men told me later that they'd never attended a shower before but they had a really great time......to me, that was one of the highest compliments I could have gotten.

Vanessa and Wil could not stop thanking me and they said it was the best shower they'd ever seen, so....mission accomplished!  YAY!!!!

Thursday, September 22, 2011

The Baby Shower

Now, I realize that my Blog title is the Trials of Baking , but it seems whatever I do, I seem to include baking in some form.  I have been working on the biggest baby shower since April.....hence the reason for no posts.....Oh, I've done some stuff and even taken step by step photos but just have not had the chance to post anything.  The baby shower, although is not a complete surprise, the majority of what's going on with it is a complete surprise to the parents to be.  I love this couple like they are my own children and even before they got married, I knew that when they had a baby, I wanted to do a shower for them.  Now, that being said, I envisioned 10 - 12 ladies at my house having a sweet little baby shower.   Never in the wildest reaches of my mind, did I see a baby shower with almost 100 people!!!  I know, right, what WAS I thinking!!!  LOL  I am happy to do this shower though and have had a lot of fun.  The shower is this Sunday and while I am so excited.....I'm ready for it to be finished. My house looks like party city and my cat is beginning to think we are moving since I have things in boxes to make getting them to the shower easier.  Since the shower morphed into such a large group, I rented a pavilion at a local park and that's where we will have the event.  I have not posted one picture of anything yet as I wanted the whole thing to be a complete surprise to the new parents.....they have no idea even what the color scheme is......and while it may lack some of the cutesy traditional baby shower elements, I think it's going to be a blast.

Last night I started some of what I have been referring to as the "sweet/dessert", as they don't even know what I'm bringing along the lines of sugar creations. LOL  They have tasted my work before and trust me to handle it all.  Well last night, I was VERY frustrated.......one of the projects was just not cooperating.....thank goodness I started early.....but at this rate, between working full time and trying to finish up all the last minute details, I probably won't be able to sleep again until after the shower! LOL  It will be all worth it in the end though.  It's going to be a fun filled day, with their family and friends, good food and lots of fun and games and hopefully they will also get lots of nice things for their little bundle of love, Xavier.

So, I hope you'll all check back in the next couple of weeks as I start posting all the projects that went into this shower.  Lots of crafty stuff and then of course baked goods as well.

I now know.....I CAN throw a huge party.....I forced myself out of my comfort zone and I feel a lot more confident in what I am capable of achieving.....it's been a great year so far!

Sunday, December 12, 2010

Lemon Glazed Ginger Cookies

Just finished a batch of Lemon Glazed Ginger Cookies.  The recipe is from the McCormick Spice link on Facebook, http://www.mccormick.com/Recipes/Desserts/Lemon--Glazed-Ginger-Cookies.aspx .  I watched a live demo of these on their site last week and they sounded really good so I decided to give them a try.  I love ginger, not as much as cinnamon, but it's one of my favorites.    This recipe turned out well.  The cookie is very slight harder on the outside without being crunchy and it's very moist and soft on the inside.  I tried the cookie before I glazed it with the lemon glaze and I'd say it's just as good plain as glazed.  The lemon glaze adds that bit of extra sweetness to balance the spice.  I personally will increase the spice a bit next time as I really love spice and to me, it could have used some more.  I realize some folks just like that hint of spice and for you, this recipe is perfect.

I started by gathering all the needed ingredients and had them all measured out.  I find it's east to do this while the butter is getting softened at room temperature.  You'll notice I cut the butter up into chunks.....even after I measured out all the ingredients and cleaned up a bit, it was still not as soft as I wanted it, and cutting it into smaller pieces helps speed this step along.


After the butter was softened enough, I added it along with the sugar and molasses to my mixing bowl.


I mixed until blended and then added the egg and vanilla and when it  was good and blended, I mixed all the dry ingredients into one bowl.


I then took a whisk and blended all these dry ingredients together before adding them to the wet ingredients.  I always do this as I want to make sure the spices are evenly distributed.  Once they everything was blended together, it looked like this:


I then used a small scoop, to make even portions to put on my cookie sheet and lightly flattened them with my hand.  As you can see, my cookie sheets are well used. LOL


When they were baked, I carefully transferred them to a cooling rack.  I made up the lemon glaze but I added more powdered sugar than the recipe stated....I can't tell you how much, but until it looked and felt right to me.  I then put the icing in a ziplock bag and sniped off a tiny corner and drizzled the cooled cookies.


After they were completely dry, I arranged them on a serving tray and ta da, cookies for some folks at work tomorrow.


Hope you enjoyed my little tutorial and that you find it helpful.  I hope that maybe there's someone out there who will benefit from seeing the process step by step.

Happy Baking!

Bakingmomof4


Sunday, December 5, 2010

Holiday Baking

The past few weeks have just flown by, getting ready for a couple visitors over the Christmas holiday!  Last week though, it was my Boss's Birthday, a luncheon at work and just needed to take something to my guys at work so I've been baking a lot this week.

First I made No-Bake cookies for my boss, which I ended up giving him the entire batch as his birthday present but then I made another batch for dessert yesterday evening as we had our friends Jenna and Peter over for dinner.  I made homemade lasagna.....I should have taken a photo of that, but I didn't .....it was really good though. So anyway, the No-Bake cookies are super easy and you never have to turn on the oven.  To me they are like fudge and a cookie rolled into one.....and since they have oatmeal and peanut butter in addition to the chocolate, they have to be sort of healthy....right?  LOL


Kids love these as well as the adults!

My guys at work all love brownies and they kept asking me when I was going to bake them something again. Not only did they ask that, it was followed by, we'd really like caramel brownies!  LOL  So I found a recipe that looked good and tried it out...they turned out beautifully, were not difficult and well, the guys LOVED them.  I never even got one to try one!


The luncheon was a great success.  We have so many that cook so well and we were all stuffed to the brim.  I made a Pumpkin Spice Cake that is a winner every time I make it......is it the perfect blend of spices and it's so moist!  I didn't get a photo of it, but I'll share that recipe with you.

Pumpkin Spice Cake

4 eggs
2 cups granulated sugar
1 ¼ cups vegetable or canola oil
1 can (15oz) pumpkin (not pumpkin pie mix)
1 teaspoon vanilla

In another bowl mix together the following:

2 cups all purpose flour
3 teaspoons baking powder
2 teaspoons baking soda
¼ teaspoon salt
2 teaspoons cinnamon
½ teaspoon ginger
¼ teaspoon ground cloves

Heat oven to 350 F. Lightly great bottom and sides of 15”X10”X1” pan you can use a 9” X 13” pan, your cake will just be thicker and you may need to cook slightly longer. I used a 11”X15”X2” pan and baked for 25 minutes.

In large bowl beat eggs, granulated sugar, oil, pumpkin and vanilla until smooth. Stir in flour mixture and mix thoroughly. Spread in pan. Bake for 25 – 30 minutes until light brown. Cool completely in pan in cooling rake about 2 hours.

Icing

8 oz cream cheese (I used the light cream cheese and it still tastes good)
1 stick butter ( ½ cup)
4 cups 10X sugar (powdered sugar)
2 teaspoons vanilla
1 cup chopped walnuts (optional)

Beat cream cheese, butter and vanilla until smooth. Gradually beat in powdered sugar, 1 cup at a time until smooth and spreadable. Spread icing over cake and sprinkle with chopped walnuts. Store in the refrigerator.


Then today I made some Spritz cookies and used my cookie press but the camera is acting up again and I didn't get any photos, but they literally melt in your mouth.  I found the recipe on The Food Network.
I have about another week before I start more holiday baking.  I love this time of year......I could bake everyday and no one thinks a thing about it. LOL  Apparently as long as it's "holiday baking", it's okay!


Hope all are having a great Christmas Season!


May you all be blessed!


Bakingmomof4