Friday, November 26, 2010

Pumpkin Scones

I love scones!  I went many years without trying to make them though because just the name intimates me for some reason.  My mind sees a tedious process and a need of a bakery degree to make them come out looking beautiful and tasting wonderful.  I obviously did get over that fear and have made several recipes over the years always looking for the perfect recipe.  I was in the mood for a yummy scone and came upon this recipe: http://www.food.com/recipe/starbucks-pumpkin-scones-214051 and decided to give it a try this morning.  I read the reviews on this recipe....I recommend always reading the reviews, you can save yourself trouble a lot of times doing that, but this recipe continued to get rave reviews.  I did double the spices in the actual scone itself and they were WONDERFUL!  The appearance, perfect, the texture, wonderful and the flavor, absolutely delightful!

To me, pictures help so much and those of you who may just be starting on the baking path, I know it's helpful to know, "does this look right:", so I took pictures of each step to help you along.

I put all the dry ingredients in the food processor along with the very cold butter.
just pulse it until it looks all mixed, it doesn't take very long.  Don't over mix, you don't want it becoming clumpy.

I then mixed the wet ingredients together and whisked them together.


Fold in the wet ingredients with the dry ingredients until mixed.

Once it's mixed, turn it out onto a lightly floured surface and knead it very gently into a disk.

Now cut the pieces.  The recipe said 6 servings, I cut mine into 8 and believe me, one is a nice serving.


You're now ready to place the scones on a parchment lined baking sheet.  If you don't have parchment paper, you can grease the baking sheet instead.  I highly recommend parchment paper.  It helps them cook without sticking and makes clean-up a snap.


Put them into the oven to bake, while you are waiting on them to finish, go ahead and mix together the dry ingredients for the icing.  Now, the recipe shows a plain glaze first and then the spicy glaze.  It's up to you whether you want to do both or not.  I chose to just do the spicy glaze and it was the perfect blend of spicy and sweet to compliment the scone.


This is what the scones look like fresh out of the oven.


Now, add the milk to the dry icing ingredients and mix together and drizzle all over the warm scones.


So, this is what you should end up with, warm, yummy pumpkin scones.


Yay, another recipe that turned out well!

Happy Baking,

Bakingmomof4


Thursday, November 25, 2010

Gingerbread House - Finale

I'm finally done!  WOO HOO!  So just to re-cap, here's what it looked like when we left at Part 4.


From here I kept putting tiny pretzels together, I trim off the bottom of each, to form my fence.  This was a slow process as I'd add one and have to let it dry before I could add another.  Slowly but surely, it came together. I added some poinsettia's to the window sill as well....didn't come out exactly like I wanted, but I think it looks okay.   I also lined the walkway with gumdrops.  Once the fence and gumdrops were glued down with the royal icing, I spread a thin layer of the royal icing and sprinkled the pathway with milk chocolate bar that had been put through the mini-chopper.


The next thing I did was attach a small wreath that I had to do in a couple stages to get the layered effect of the leaves but I think it's cute.  To the roof I added a widow's walk.  It's four pieces of piped royal icing that was tinted black and left to dry over-night.  Then I attached them to the roof.....very pleased with how it turned out.


To make the board just a bit more attractive, I attached a piece of ribbon all along the edge of the display board.


The final touch was to make it look like fresh snow had fallen.  This technique was accomplished by putting powdered sugar in a small sieve and gently shaking it all over the entire project.


So here is the finished house.


Dedication:

 I have dedicated this Gingerbread House in memory of my Gramma Elsie.  Several years ago, my youngest daughter and I did a gingerbread house from a kit as my Gramma watched.  She was fascinated with the whole process and we tried to get her to help but her response was, "No, I'm enjoying just watching you two".  I told her someday I'd make one from scratch and she said she would look forward to seeing that.  Well, my Gramma passed away in March and I never made that house from scratch for her to see, so I was determined  I would not put it off any longer.  I feel we need to do things we really want, while you have the chance to do those things, because you may never get another opportunity.  I felt my Gramma with me as I put this house together and I think she really likes how it turned out.

I hope you all enjoyed this journey along with me.  I learned so much and really enjoyed the entire process!

Bakingmomof4

Sunday, November 21, 2010

Gingerbread House - Part 4

It's coming together and I'm starting to see the light at the end of the tunnel on this project.  Yesterday I started with working on my trees.  I started with sugar ice cream cones for the base, which I trimmed in various heights.  Then I tinted some of my royal icing green and proceeded to try and create a life-like tree.  It took about 3 hours to do all the trees.....much longer than I thought it would.  Today after the trees had dried over-night I sprinkled some powdered sugar on one to get a feel for how they would look with "snow", all in all I'm happy with how they turned out.


I did take one of the trees and while it was still wet I added mini M&M candies to it.  I took a yellow Starburst candy and flatten it out a bit and cut a star shape for the top of the tree.  I had to hold it there a while so it could dry enough to stay.  I then took more Starburst candies and shaped "presents" out of them to be placed at the tree.  I am really happy with how the gift bags came out.


About 10:00pm last night I started thinking about the two walls with the windows and what I might do to make them look interesting.  My sweetie suggested making a stone look, and I thought that was a great idea, so I took Tootsie Rolls and cut them into small pieces and made stones. I got about 1/2 a wall done and decided I was too tired....so I stopped for the evening. This morning I finished making my stone walls and I knew I'd need a grout of sorts.  I saved the sugar cones pieces that I has trimmed off and I put them into my mini-chopper and ground them finely.  I then added royal icing to them to make a sort of grout.  I started out with a #4 tip, but switched to a # 5 and still, some pieces of the sugar cone got stuck, but I did manage to grout both walls.  I also ended using this technique to the porch steps as well.  This whole process took about 1 1/2 hours.  I think it turned out GREAT!  

Pretty cool,don't you think?

So next on my list was the roof.  The roof is made of fondant.  I rolled it out fairly thin and then cut tiny little circles.  I now have a small callous on my thumb from cutting so many little circles, but I did a little happy dance when the roof was completed.  It turned out exactly as I had imagined it should look.  I can't tell you how happy I am....sometimes you visualize how you want something to look and it doesn't come out that way, but I think I nailed this roof!  It took me 3 hours to cut all the circles and apply them to the roof.


My work this weekend is complete.  I'm in the process of making a pretzel fence and I want to make a walk-way and there are a few other little surprises that will be great if I can get them to work.  Coming up on a long weekend so I'm hoping to complete the house this next weekend so it's ready for display on December 1, 2010.  Wish me luck.


Thanks for following me here and if you have any suggestions or can offer any advice, like how come my windows are leaking?  Let me hear from you.

Bakingmomof4

Wednesday, November 17, 2010

Gingerbread House - Part 3

Hey there, I'm back.  The past few days the weather has gotten very humid, but the temp has been nice so we've been leaving the windows open and it's been just beautiful......except, my gingerbread house DOES NOT like the humidity.  The pieces starting getting soft so we had to close the house back up, turn on the A/C to get the moisture out of the air and the pieces did harden back up.....one small casualty was the windows started leaking.  That is the only way I can describe it.  It wasn't bad and I did a little damage control, to me it's horrible looking, but I know the reality is, it's fine and I learned a very valuable lesson.

So I have attached the roof and also the 2 porches.  They are drying now and this weekend I hope to get the roof textured, I'm not going to tell you what I'm going to use yet, you'll just have to tune in for part 4!!  I went to take a picture of the progress so far and the camera decided to just not work.  I finally took out the batteries and put them back in, they are brand new batteries, about 6 times and for a moment, the camera worked again and I got one shot of the house thus far.  I'm looking into borrowing a camera for the remainder of the project.

I still haven't completely decided how the entire thing will be decorated, I do know how the roof will look and I've got a cute idea for a fence around the house but the rest, I guess it will come to me as I go along.


It's a little crooked but all in all, I'm happy with the progress so far.

Thanks for looking!

Bakingmomof4

Sunday, November 14, 2010

Gingerbread House - Part 2

The assembly of the house started today.  The first step being, making the royal icing so I'd have my "glue" to hold it all together.  This was the easiest thing I did today in connection with the gingerbread house!  Measure out a pound of sifted powdered sugar, and I did weigh it, but generally it's around 4 cups, 3 egg whites at room temperature and 1/2 teaspoon of cream of tartar.  Mix this at a slow to medium speed for about 10 minutes.  This is one of those times, a stand mixer is the best!


Make sure to keep the royal icing covered well with plastic wrap at all times because it will harden fairly quickly.

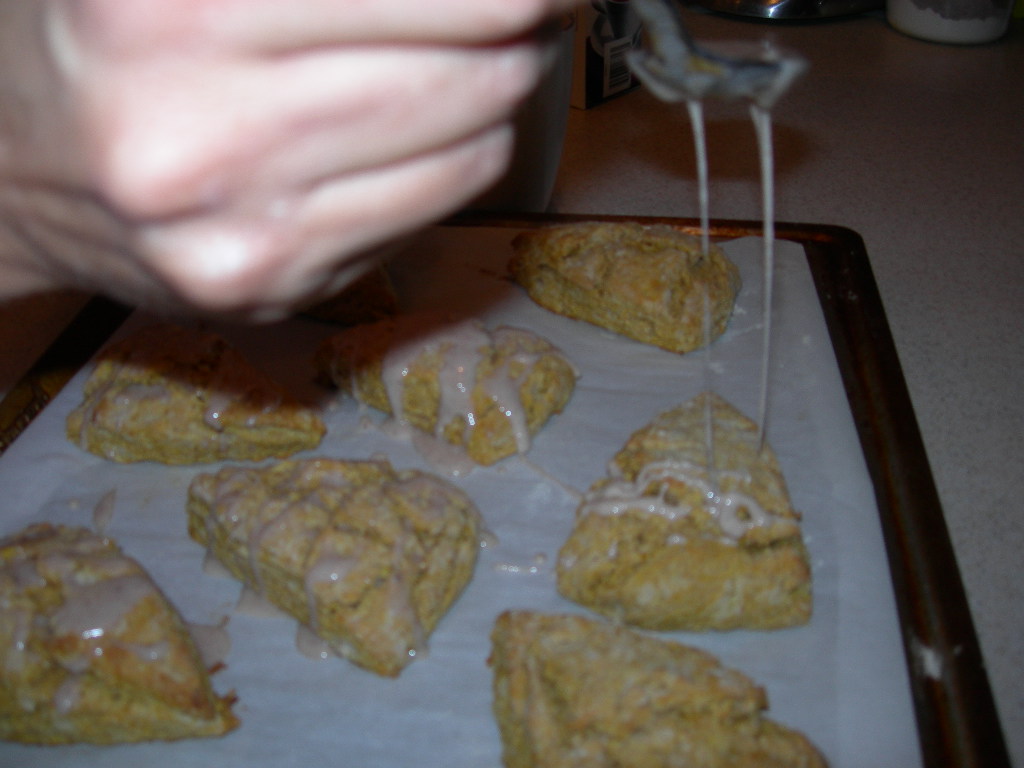
My original thought was to put the house together and then start decorating, but then I thought, it would be easier to do a little of the decorating while the pieces were still flat.  So, I decided to outline the windows and the doors.


It was at that point I decided that I wanted the open windows to look like they had little lace curtains in them.  My first attempt was to ice the pattern onto parchment paper and let it dry....my thought was I could then just attached the curtains where they needed to be....unfortunately, that didn't work for me because they broke as soon as I lifted them from the paper.  Plan 2 was to do string-work to the gingerbread pieces.  Now, I've done some cake decorating, a lot of cookie decorating, but I have NEVER done string-work.  I've read the procedure on how to do it, have looked at hundreds of photos of it and only dreamed that someday I could do some decent string-work. Today I thought was as good a time as any to start practicing.  So the idea is to do the work on the back of the cookie so when you look at it from the front, it appears to have little lace curtains.  Now, given this was my first attempt, and the first set broke off when I accidently hit the piece and it wasn't quite dry, I think I did pretty good. My idol Toba Garret would probably give me a "F:" on the assignment, but  seeing how it's actually hanging on, I'm doing a little happy dance.


At this point, I knew I would be decorating with different little candies, so I unwrapped them all so that when I actually start, I won't have to stop to open bags and stuff.  I got most of my candy after Halloween and 75% off, so it was all in little individual packages.  I also realized about this time that I had taken over all my counter space in the kitchen and it would be easier from here on out to be able to leave everything out and work on it a little at a time.  Now given my children are grown and the dining room doesn't get much use, it has now become Gingerbread Central.


Then, I took a break and went outside and enjoyed some beautiful weather and gave the pieces time to dry.

When I returned, it was time to put the house together and it went together better than I thought it would.  I had worried that that would be the hardest part.

As you can see, it looks pretty good so far.  No...... worrying about the house coming together was misplaced....what I should have been worrying about was the roof coming together.  Kept putting it together and it kept coming apart, after a lot of the icing glue and several choice words, that, lets just say, were not very lady like, it is together and just drying.  After the trouble with that, I think I'll wait until another time to try and actually place the roof on the house.


So, that's it for today's work, which when I look at it, I'm wondering how I spent about 5 hours on this thing today! LOL

Bakingmomof 4

Sunday, November 7, 2010

Gingerbread House - Part 1

So, after many, many years of saying, "I'm going to bake my own Gingerbread House", I finally decided, this was the year.  I started this with looking at many photos and recipes and picked my weekend to begin.  That was last weekend, when the recipe I chose turned out to be a nightmare.  Now, I'm not new to baking, have been doing it for 30+ years, and even have done a bit of decorating as well.  This recipe just didn't come together.  So, I decided that was enough for that weekend.  Did more research, found another recipe, by Teresa Layman and decided on the Two-Story City House pattern from http://www.gingerbread-house-heaven.com/ . I assembled all my ingredients and dove in.  Let me just say, after making literally, hundreds of cut out cookies, this was not as easy as I thought it would be.  I followed the the instructions to the letter and my first batch came out of the oven looking like they just weren't baked enough.


At that point I decided to use some of my own cookie knowledge and instead of rolling the dough between just the parchment paper, I decided to throw flour on the counter and start rolling it out as I would my normal cookie dough.  It started working much better and the dough started looking better when it emerged from the oven.  It seemed to look, in my opinion, as it was suppose to look.


So, here are all the pieces ready for the next step in my gingerbread house building journey.


Once the pieces were all baked, I decided that the windows on the back of the house would be nice with a colored glass to them.  I once saw a program that taught, if you took Jolly Rangers and put them through a mini chopper until they became the consistency of dust, that you could create beautiful windows.  I put that theory to the test and it worked beautifully.

Filling them with the crushed Jolly Rangers.....I chose blue ones.

Filled and ready to melt them.  I had the oven set at 350 and let them melt for 10 minutes.

I think they turned out rather nicely.

So, for today, that's it.....I'm glad I've decided to take this thing in stages.  I now know why it takes months for some of these works of art to be completed.  At this stage in the game, I'll be happy if I can get mine to stand up and look like a house.  I had announced to friends and family that I would make one each year......I'm thinking right now, I'm not sure if I want to do one every year, it's very time intensive.....maybe I was being a bit over-confident in my ability to patiently build a gingerbread house.  Time will tell.

Bakingmomof4